- Setting up your account
- Download the App
- Log in to your account
- Setting up your app's interface language
- Connecting to a charger
- WiFi Mode
- Hotspot Mode
- Set the connection model
- Explaining the charging procedure
- Using the device's main functions
- Whole face test
- Partial face test
- Saving customer records
- Introduction to dermis monitoring
- Skin contrast function
- Software Update
- App Update
- Bluetooth and firmware update of skin tester
- FAQ

xSkin App Operation Guide
Part 1 - Setting up your account
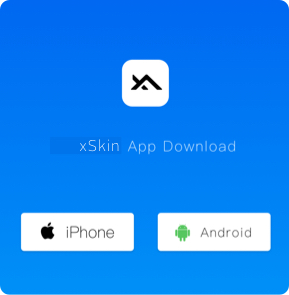
1. Download the App
Use your phone's internet browser to open the following website: https://xiaofutech.com/xf/ Use your phone's browser to download the app and begin setup.
2. Log in to your account
① Input a valid phone number to login in. Ensure you ask your company's xSkin manager if youcan use your phone number in this way. If problems occur with using a particular mobile number, continue to contact your manager.
② Every time you log in the app will send an approval code to your phone number, so you don't need to create a password.
3. Setting up your app's interface language
• Pending your approval, the app's interface's language options depend on accessing languages already installed on your phone, although the app comes with English and Mandarin pre-installed as standard.
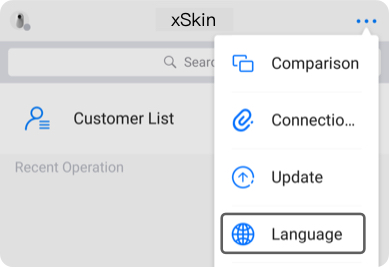
• Alternatively, you can find the button marked “change language” on the right-hand side of the main page, to quickly switch between the English and Mandarin options.
Part 2 – Connecting to a charger
xSkin Device needs a wireless internet connection to transmit images to your phone, two methods for doing so are outlined below.
1. Method 1 – WiFi Mode
In a regular internal environment, when you connect to the wifi, the app can connect to the xSkin Device over the same network.
After connecting to a particular network for the first time, you will not need to reinput the network's password. The app will remember the password and connect automatically.
2. Method 2 – HotspotMode
If the WiFi connection in an internal environment is unstable, you can use this method. In Hotspot mode, the xSkin Device can independently host a WiFi network, and uses your mobile networks provider's mobile network data to transmit pictures to your phone.

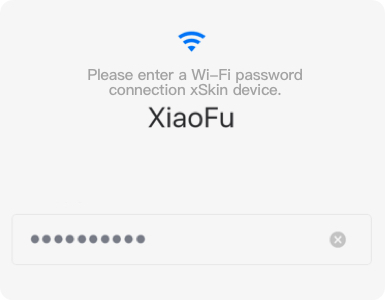
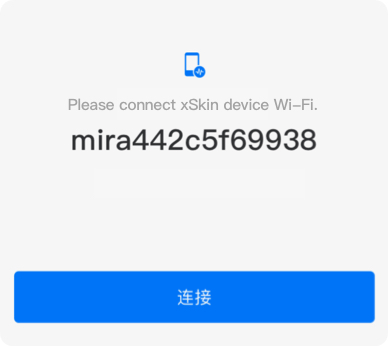
At this point press the button marked “begin skin examination”, a prompt will appear on the app interface, after pressing this prompt you will switch to the WiFi interface, at this point enter the wifi hotspot name, press enter, return to the app, and after waiting a short while, you will be able to connect to the xSkin Device.
The instructions above are specific to using this app on iPhone operating systems. To perform the above operation on Android operating systems, you still must turn off your phone's wifi before attempting to connect with your xSkin Device. However, after you have pressed “begin skin examination”, you can directly allow the programto begin setting up the network, then the app will automatically connect to the network, thus allowing your iSkincare device to stream pictures back. This means the process is less complicated on the Android operating system.
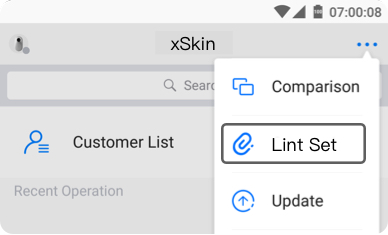
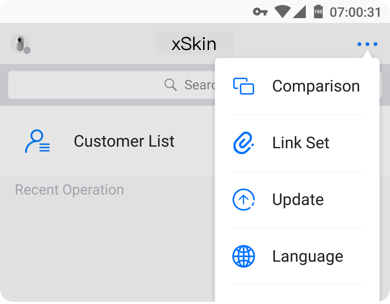
3. Set the connection model
Find“Link set” button in menu of the main page then set your choose. Hotspot Mode is the default.
4. Explaining the charging procedure
• If during working, the power stored in the USB is insufficient to charge the device, thelight on the USB will turn yellow.
• If you insert your USB cable into the charger, the charging process will be complete in about an hour. To signal this, the light will change from yellow to blue. At that point, the USB charger cable can be removed.
• You can continue to use the device while it is charging by pushing down the start button.
Part 3 - Using the device's main functions
1. Whole face test
Press the “begin skintest” button to begin the Whole Face skin test. In accordance with the app's on screen instructions, successively scan the 5 different areas of the customer's face; the forehead, left cheek, right cheek, nose, and chin. You must pay attention to the following:
• As far as possible, adjust the position of the xSkin Device to suit the customer's facial topography, then wait for the camera to focus, before pressing the button to take the picture. Taking the picture will take about half a second, do not movethe camera during this time and keep your hand as steady as possible.
• When examining the nose, place the camera on the bridge of their nose, as the skin here is smooth, making the picture comparitively clear. This part of the nose is normally enough to show the general state of the skin's condition.
• The other parts of the nose, such as the tip, alae, and sides, are more difficult to survey, so avoid scanning them during the whole face test.
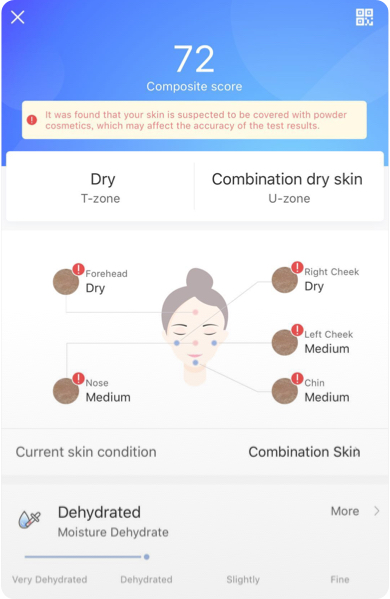
After the pictures have been taken successfully, enter the personal information of the customer, including sex, and date of birth (which will be used to calculate age). After pressing the button labelled “complete”, the app will begin processing the date. This should take around 15 seconds. When the results are displayed, it will be quick and straightforward to assess the state of the customer's skin.
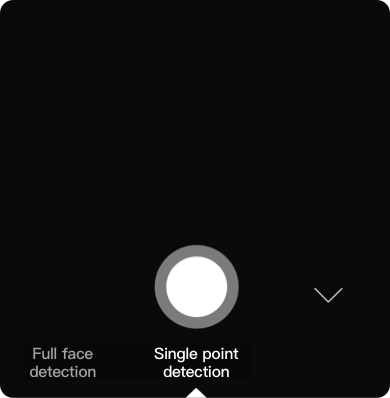
2. Partial face test
The partial face test is very similar to the full face test. On the initial options menu select the “partial face test” option, and then select the part of the face to test. The following instructions and results work in the same way, but you will only be required to take the photo for that part of the face.
3. Saving customer records.
Sales need not save the records of each customer, and this process is not performed automatically. If you wish to do so, press the button marked "save" .
In the event that you wish to follow up with a certain customer, press “begin skin test”, and save that particular customer's records.
4. Introduction to dermis monitoring
During both the “whole face test” and “single point test” modes, the “dermis” monitoring mode is also available.
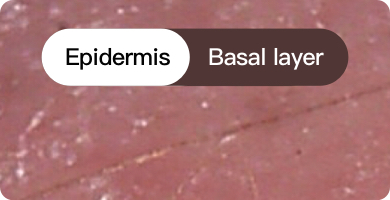
The test result is same in epidermis or dermis, cause we capture both epidermis and dermis image data.
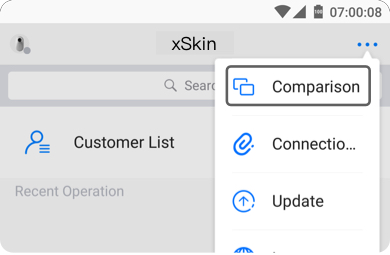
5. Skin contrast function
Click on the top right corner of the home page"..." Button to enter the skin care contrast function. The principle of skin care contrast is to use the "Single Point" test to measure the same skin position and compare the skin test results from each dimension. Please note: you need to boot the skin tester at the home page of App. When the bottom button shows "Start Testing", then enters the "Comparison" function.
Part 4 – Software Update
1. App Update
iPhone/iPad Version:Like the regular app, you can get updates when you have an update prompt on the App Store.
Android Version:When you open the App, there will be a new version of the pop-up message-box, Follow prompt text operation.

You can also find the "Update" button on the top right corner of the home page which is for update checking Manually.
2. Bluetooth and firmware update of skin tester
When you open the App and the skin tester, if you have the skin tester drive software updates, the following prompts will appear:
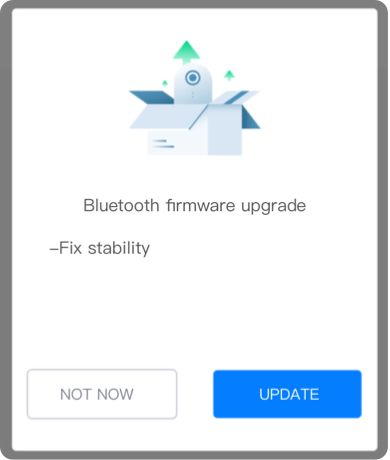
Click the "update" button and follow the steps. After the upgrade is completed, the skin tester will automatically shut down. The skin tester needs to be started manually to reconnect the App.
Tip: when you update the skin tester Bluetooth firmware, please let the skin tester as much as possible the state of full power, if the low power, please plug in the power supply.
Part 5 - FAQ
Will it a better experience to use the Wi-Fi model than using the hotspot mode?
In general, using the Hotspot mode is smoother and more stable than using the WiFi model. Because in a home or office WiFi network, real-time image transmission during skin testing may be limited to other devices using the network. By the Hotspot mode, the WiFi created by the skin tester is used solely for skin testing.
What if the connection is still not successful in Hotspot mode?
Reboot the skin tester and try again.
Why does connection always fail to connect with WiFi in Starbucks or someplace like that?
Somepublic place such as Starbucks, Pizza Hut, they provide WiFi of authorization network, generally need us to open their websites to login authorized. The iSkincare tester temporarily does not support this function.